

Your tailored boot liner fitting guide: How to fit and remove your boot liner
Tailored car mats and boot liners are essential for any vehicle, keeping your car's interiors and cargo area protected from dirt, spills, wear and tear, and bad odours. Whether travelling with muddy paws, camping gear, or sports equipment, a well-fitted boot liner offers durable, waterproof protection that keeps your vehicle looking new and clean. We've mentioned just a few advantages; all you need to do is find the year of your car and select the boot liner that will fit the exact dimensions of your specific make and model.
Afterwards, it is important to consider certain factors before fitting and removing a Hatchbag boot liner. Proper installation ensures that the liner stays in place and provides optimal protection. It's also important to know how to effectively remove and clean the liner to maintain longevity.
This guide acts as a general boot liner fitting and removal guide, including simple steps to ensure complete protection and what to consider for different vehicles.
In this guide:
- How to prepare and clean your cargo area before fitting a boot liner
- How to fit your boot liner to different materials
- What optional extras should you consider to complement your boot liner?
- How to remove your custom boot liner
- Frequently asked questions
How to prepare and clean your cargo area before fitting boot liner
Before fitting your chosen boot liner, which is available in a wide range of popular colours, proper preparation of your vehicle's cargo area is essential. Ensure the boot is completely debris-free and the load cover is removed to allow full access and space. Silicone will make it impossible for the self-adhesive fasteners, so make sure any is removed during the preparation step.
Next, adjust the floor level and seat incline to match the specifications provided with your boot liner order, if applicable. This ensures that the liner fits perfectly and offers optimal protection. Custom boot liners are designed to fit precisely; adjusting these elements is critical to achieving a snug fit.
At Hatchbag, we recommend thoroughly cleaning your car boot before fitting the custom boot liner; ensuring the best adhesion possible.
Use a safe, fast-acting solution to remove any adhesive, tar or grease on a lint-free cloth, scrubbing the surface of the boot.
With a second dry lint-free cloth, dry this area - you may need to repeat steps 1 and 2.
Stick the self-adhesive loop fasteners to the area and wait until 24 hours before attaching your new boot liner.
If required, replacement kits are available under the specific car model's accessory page.
For more information, read our detailed maintenance and cleaning boot liner guide here.
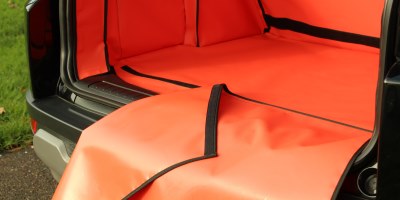
How to fit your boot liner to different materials
Depending on your vehicle, you may need to alter how you fit your custom boot liner. Typically, this will either involve a hook fastener-friendly carpet that works with Velcro or plastic.
Hook Fastener friendly carpets
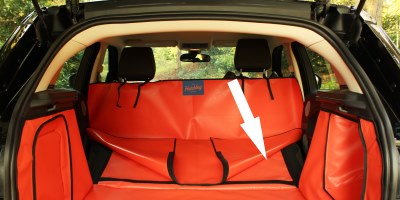
When fitting your boot liner to a Velcro-friendly carpet, start by placing the boot liner in the cargo area with the Hatchbag logo positioned at the seat end. The hook fastener on the base of the liner will directly attach to the carpet, ensuring a secure fit.
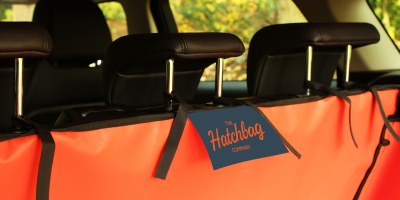
Begin by looping the hook and loop fastener straps around the middle headrest posts. Ensure you hold the front part of the liner's base in position to avoid pulling it too far up. Repeat this process for the left and right headrests to secure the front of the liner. For the elastic version, attach the elastic loops or rubber bungees sewn into the front panel of the liner to suitable points around the rear seat. Again, hold the front part of the liner’s base in position to prevent it from being pulled too far up.
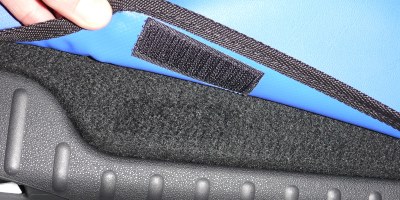
Carefully position the boot liner's side panels snugly against the sides of the cargo area. The hook fasteners welded or sewn on the reverse face of the side panels will attach directly to the carpet, ensuring a secure fit.
When fitting Rear Plus or Rear Split versions, work from the bottom upwards. Fold the Velcro from the bottom corner to ensure a strong seal, then attach the headrest straps.
Fitting to plastic
If your vehicle's interior has plastic trim, start by positioning the side panels of the boot liner snugly into place. The self-adhesive loop fasteners will attach the liner to the boot sides.
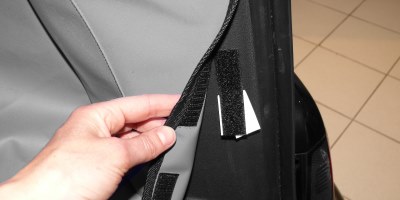
Identify the locations of the hook fasteners on the outer face of the boot liner and their corresponding positions on the boot's interior. Align and attach the self-adhesive loop fastener tabs or strips from the fitting kit to the plastic or metal trim. Ensure that the fasteners are firmly pressed into place to achieve a strong bond.
What optional extras should you consider to complement your boot liner?
But it's not just a custom boot liner that can offer complete protection from stains, odours and damage. There are certain car accessories that complement the Hatchbag boot liner to work in tandem. Browse our top picks for boot liner accessories below:
Seat flap
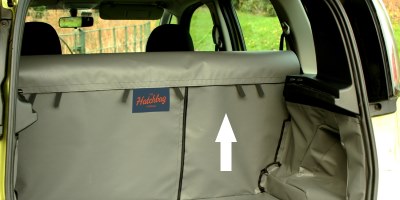
The seat flap is designed to protect the top of your rear seats, giving additional protection to not just the cargo area, but the back of your car as well. Used in conjunction with the rear plus or split option, the seat flap covers should be positioned on the exposed gap when the rear seat is in the folded position, then attached to the loop fastener strip.
If the seat flap sits over large headrests and obstructs your rearview, carefully create openings in the flap to accommodate the headrest posts.
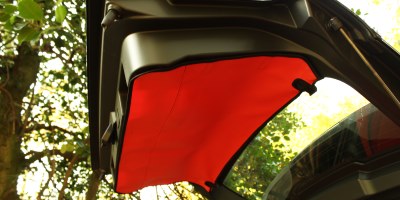
Tailgate cover
Line up the cover with the tailgate and clean the areas where the self-adhesive loop fastener tabs will be stuck. Use the self-adhesive loop fastener tabs to attach the cover to the plastic trim.
Bumper flap
After fitting the boot liner, consider attaching a bumper flap to the loop fastener strip sown at the base. The bumper flap will act as protection for unloading and loading large items from the cargo, either folding into the vehicle or detached and stored elsewhere after closing the tailgate.
Floor extension
This car accessory is designed to be used with a rear plus or rear split version boot liner. It offers further protection to the back of the front seats and extended floor area when a rear seat is folded flat.
Frequent use kit
Only available for hook fastener-friendly carpets, this fitting kit is perfect for preventing any damage when attaching a custom boot liner. The carpet may “fluff up” with frequent removals or fittings, therefore, this kit is ideal to help avoid and reduce this issue.
Browse our entire range of car accessories for your boot liner here.
How to remove your custom boot liner
When it's not in use, it is simple to remove your boot liner. Loosen the Velcro tabs around the base and side panels, before undoing the straps around the headrests. Fold the side flaps down, followed by the back of the liner, before removing it carefully from the boot of your vehicle.
If you have any questions or want more information on fitting and removing a boot liner, contact the Hatchbag team to speak to our experts.
Frequently asked questions
Why is a boot liner perfect for keeping your car clean from a new puppy?
Getting a new puppy is an exciting time, yet it is important to remember that they are often messy, shed hair, track dirt and sometimes have accidents. A tailored boot liner covers the entire cargo area, preventing damage and stains to the interior, whilst managing bad odours as well.
The Hatchbag boot liner also provides a comfortable, non-slip surface for your puppy so that they are completely safe and comfortable when travelling - a practical, stylish and essential accessory for pet owners.
For more information, read our expert guide on the best boot liners to protect your car and dog here.